Below are some famous logos with silhouettes and a tutorial on how to make a silhouette in Photoshop.
Jumpman
NBA
MLB
James Bond
Wayans Bros. Entertainment
This brief tutorial by Jennifer Apple will show you how to create an iPod ad silhouette in Photoshop:
I See iPod People — The Photoshop Silhouette
If you’re crazy about those iPod ads and want to make one yourself, it’s actually pretty easy. The first thing you’ll need is an image of someone that you can extract from the background without too much work.
Let’s Start
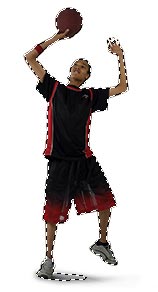
To begin settle on the dimensions of your canvas and resize your original photo. Go Image> Image Size menu. Click on Resample Image and choose Bicubic Sharper from the drop-down menu. This is the best setting for making sure that an image doesn’t blur. For the Dancing Basketball Player I resized so it would fit into a target canvas of 158 x 292.
Make Your Selection
Make sure to do some quick tests before starting the more precise and time-consuming selection work, because some images just don’t look all that great when you convert them to a silhouette.
Use the Magic Wand to select your background, and Inverse it (Select> Inverse), then copy and paste this into a new canvas with your target background color to see how it looks. If it’s promising, then go back and make the detailed selections that are necessary for this to look professional.
Improve Your Selection
If you have a good solid background to work with in your source photo you can select most of it easily by using the Magic Wand Tool. The next step is to blow up the canvas to 300% and start doing touch-ups with some Lasso Tool selections. Once you’ve got the background of the image selected just right, Inverse (Select> Inverse) so that you have the subject selected, and then Copy (Edit> Copy).
New Canvas With 3 Layers
Create a new canvas with 3 layers (Layer> New Layer x 3):
LAYER 3 – will be the silhouette cutout.
LAYER 2 – will be the color cutout.
LAYER 1 – will be the background color [#9369BF]
First fill your background layer with a solid color. Next paste your cutout selection into both Layer 2 and Layer 3. Now make sure Layer 3 (the top most layer) is active, and Command-click (PC: Control-click) to select your cutout. Set your foreground color to black, and use Option-Delete (PC: Alt-Backspace) to fill the selected cutout with the black. That’s it. Save as a GIF. Now I’ll explain why we have Layer 2.

A Perfectionist’s Work Is Never Done
Your file should be fine just as it is, but the following adds a nice touch. Use the Eraser set to 15% opacity and try and reveal some of the underlying color image on Layer 2 by making a couple of passes on Layer 3. I did this to the arm and hand holding the basketball. Also add a very soft shadow near the feet. Almost all the iPod ads I’ve seen include this.
If you’re Bono you’ll also want some of your face to show through as well, which is what Apple did for the U2 TV spot.
Troubleshooting
Jagged Edges — If you find your selection and cutout has left you with some jagged edges, try deselecting the cutout and applying a Gaussian Blur (Filter> Blur> Gaussian Blur) set at a very low Radius of 0.2 pixels. This can help soften the edges.
Sore Eyes — Don’t go crazy with electric day-glo colors in your background. Here are some actual iPod ad colors:
Blue #1379F9, Purple #9369BF, Orange #F59110, Green #9FCC39, Pink #EB5297.
Good luck with your iPod silhouette creations!